But you gotta do it within 90 days
Did you accidentally delete a message you wanted to keep? Some of the Facebook conversations we have with other people are critical, and it is awful to lose them, but don’t panic. There are several ways to retrieve deleted Facebook messages.
Take note that Facebook keeps all your deleted data for 90 days. That means you have exactly 90 days to retrieve deleted text messages. After that, the chances you’ll succeed are very slim.
1. Recover Archived Messages
If you’re an avid user of the messenger app for Android or iPhone, it is more likely that you accidentally archived a message. Deleting it permanently takes a few steps, and in the end, you would receive a confirmation notification. It’s not that easy to accidentally delete a message from the mobile app, so let’s have a look:
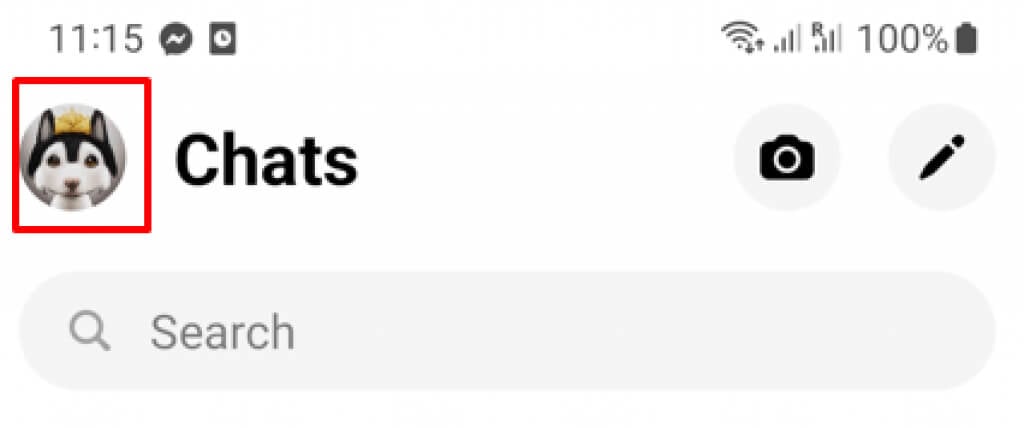
- Open the Messenger app on your phone.
- Tap your profile icon at the top left corner of the screen.
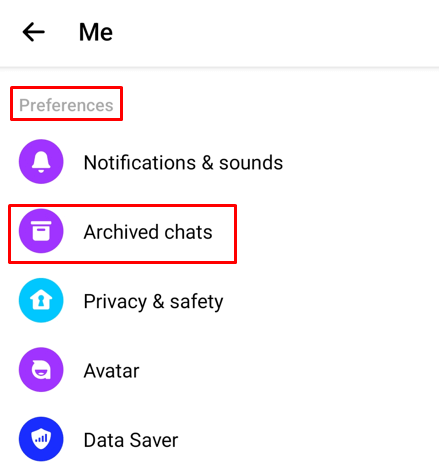
- In the Preferences section, select Archived chats.
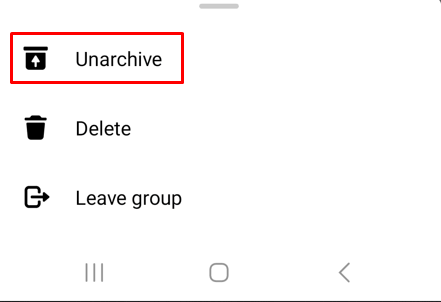
- Find the conversation you want to retrieve and swipe left if you’re using an iPhone, or tap and hold if you’re an Android user.
- A pop-up menu will appear, select Unarchive, and the chat will appear in your inbox.
If you want to unarchive a message using your PC follow these steps:
- Open Facebook in your web browser.
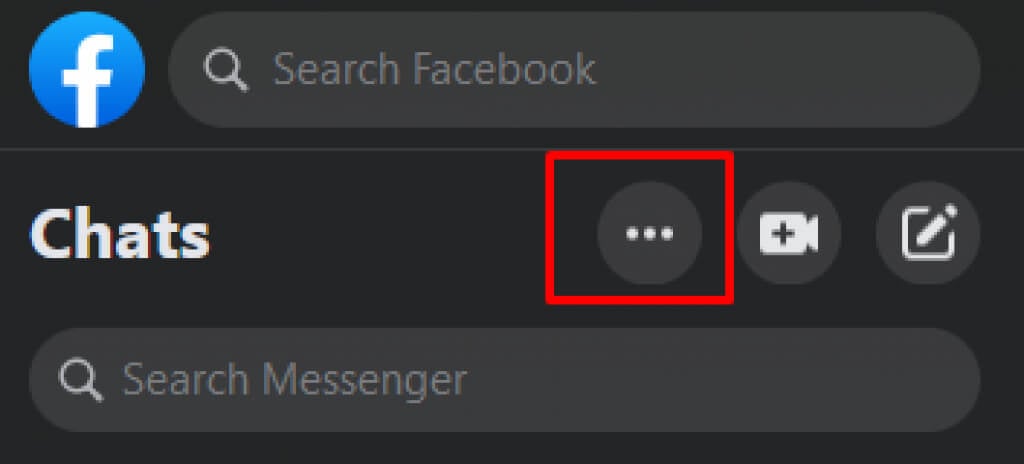
- Go to Chats, and select See All in Messenger at the bottom of the chat screen. It’s typically written in blue.
- Select the three-dots menu in the upper left corner of the screen.
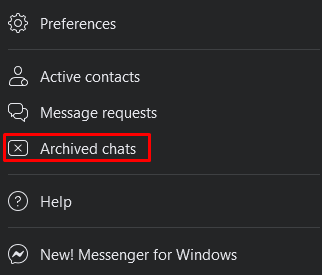
- Select Archived Chats.
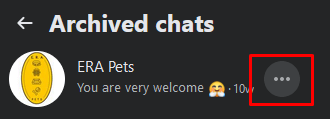
- Find the conversation you were looking for and select the three dots menu next to it.
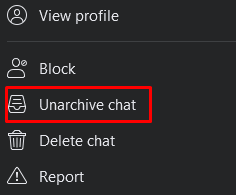
- Select Unarchive chat.
Congrats, you successfully unarchived the lost conversation. It now appears in your regular inbox.
2. Ask the Other Person for a Copy
Sometimes the message you’re looking for is simply buried in the sea of messages in your inbox. Try scrolling through Messenger and see if you can find the conversation you thought you deleted. If you still can’t see it, use the search bar and type the name of the person you chatted with. If the message wasn’t deleted, it should appear in the inbox.
If you confirmed that you deleted the conversation, you can always ask the other person to send you a copy of your conversation. Deleting a message removes it only from your inbox. The recipient, or the other side of the conversation, should still have it in their inbox. They can easily take a screenshot of the conversation and send it to you or copy the message and paste it as a new one.
3. Check Downloaded Data
If you ever used the Download Your Information Facebook feature, chances are you have the lost conversation saved on your computer. You can find it in a ZIP file named “facebook-yourusername.zip.” When you unzip it, the folder will be named “facebook-yourusername.”
Here is how to unzip the file:
- If you’re a Mac user, simply double-click to unzip.
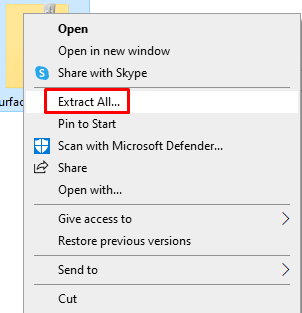
- For Windows users, double click then select Extract All. You can also right-click on the Zipped file and select Extract All from the menu.
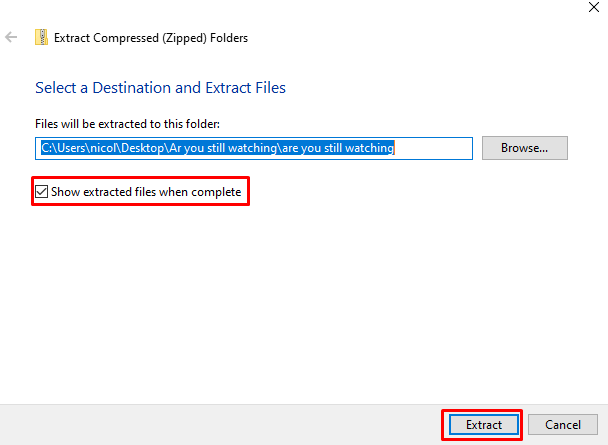
- Choose the location where you want the files to be extracted, and make sure that the Show extracted files when complete box is ticked. Then click Extract.
Now go to the extracted files and find a folder named your_messages.html, double click it, and your messages will open in the default web browser.
This method won’t work if you use the Download Your Information feature after you deleted the message you’re looking for. It also won’t work if you used the feature before the conversation took place.
4. Use File Explorer or Connect Your Android Device to Your PC
You can try retrieving the deleted chats from your Android phone with the File Explorer app. However, this won’t work if you recently formatted your device.
- Open the File Explorer app.
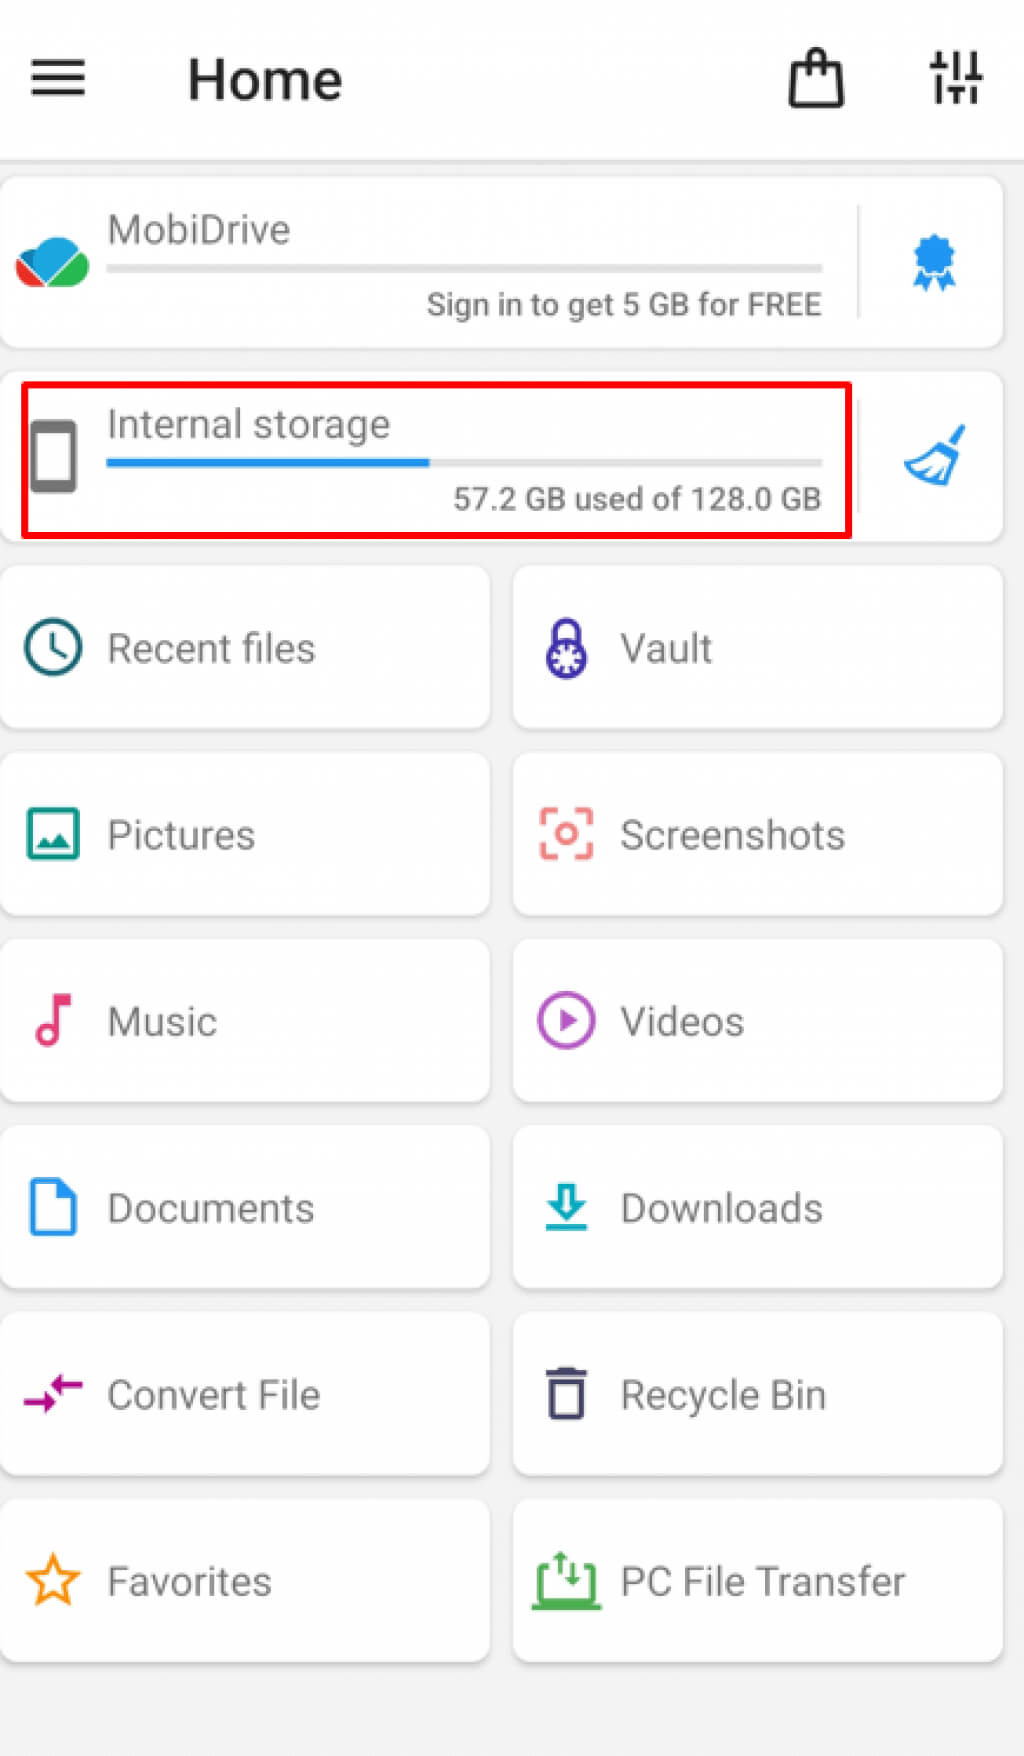
- In the storage section, navigate to either the SD card or Internal storage (this depends on where your phone keeps the temporary files)
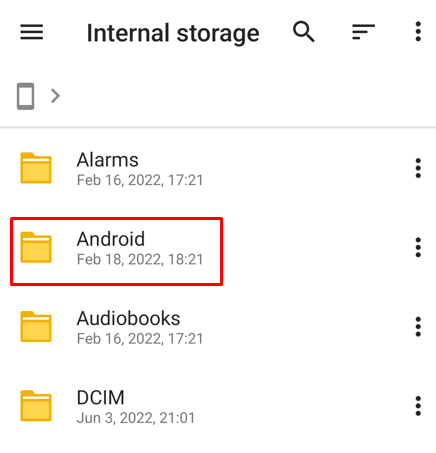
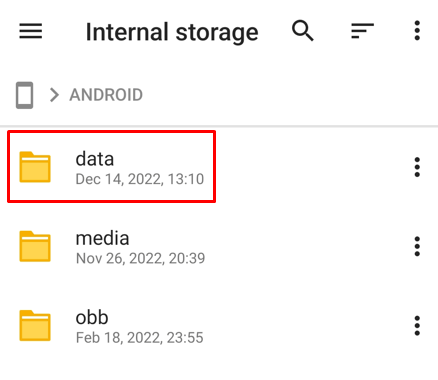
- Find the Android folder and open it. This is where all Android apps are stored.
- Open the Data folder and go to the Cache folder. In it, find the fb_temp file. Open this file, and you can use it to retrieve deleted messages from Facebook Messenger.
You can follow the same steps to find the fb_temp file if you connect your Android phone to a PC. In that case, you don’t need the File Explorer app. You can just open your phone’s folder, and in the Facebook Data folder, search for “com.facebook.orca.” There, you’ll find the temp file you need.
Unfortunately, iOS devices, such as iPhones and iPads, can’t use this little trick to access the temp files. Instead, you’ll have to use data recovery software. There are many data recovery programs out there that can retrieve deleted files such as Facebook chats, posts, photos, and more.
5. Check Your Email
If you can remember some of the content of the message you’re trying to retrieve, you can search in your email. Open the email containing the Facebook notification, and the message will be there. Note that this will work only if you chose to receive Facebook notifications in your email.
One way to prevent losing the messages by accidentally deleting them is to set up an email notification now. Here’s how:
- Open Facebook in the web browser and select your profile picture at the top right corner of the screen.
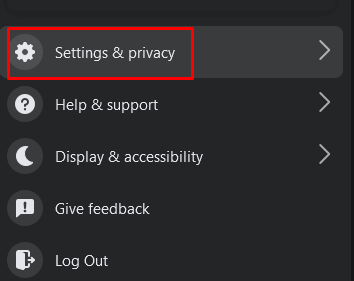
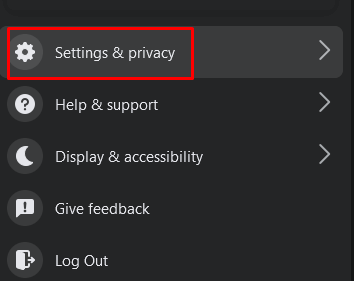
- From the drop-down menu choose Settings & privacy.
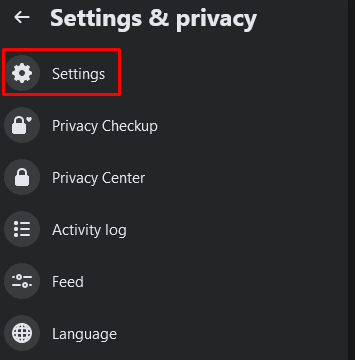
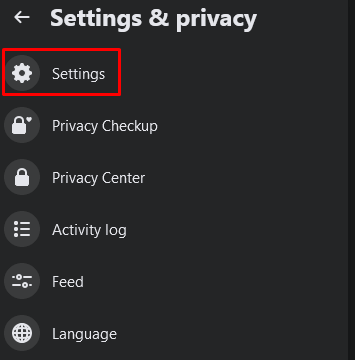
- Now choose Settings.
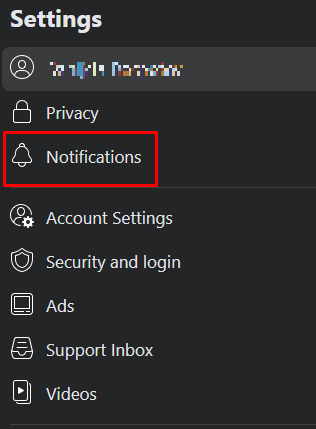
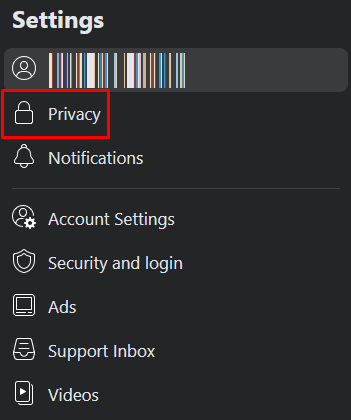
- Find Notifications in the left side menu and select it.
- At the bottom of the Facebook page, under the How You Get Notifications section, select Email.
- Under Email frequency, check All notifications, except the ones you turn off.

Now you’ll start getting messages in your inbox. You can also get a notification by SMS, and the social media platform will send them to your phone number. Just make sure not to delete the notification messages.
6. Back-Up Your Messages
To prevent losing Facebook text messages in the future, you can back them up using the account settings. In fact, you should do it periodically so you can always have access to your messages, Facebook posts, and pictures. This is also a way to get a copy of messages that can be used as legal evidence if needed.
Backing up Facebook chat is about the “Your Facebook Information” feature. You’ll request the social media platform to send you a download link with all your Facebook information. But you’ll have to choose the date range as well as the file format in which to receive the copies. You can also select to download all Facebook information or opt for a certain type of information, such as messages, photos, or posts.
- Open Facebook in the web browser and make sure you are logged in.
- Select your profile picture in the upper right corner to open up the menu and then go to Settings & Privacy.
- Choose Settings.
- In the left panel menu, select Privacy.
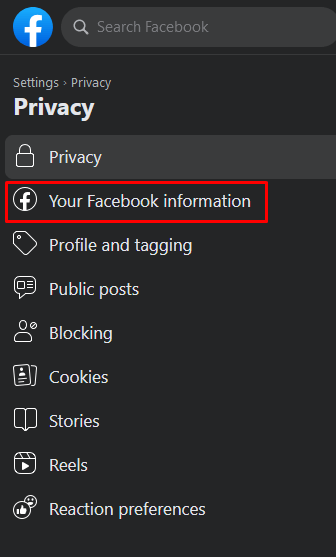
- When the new window opens, select Your Facebook information from the left menu.
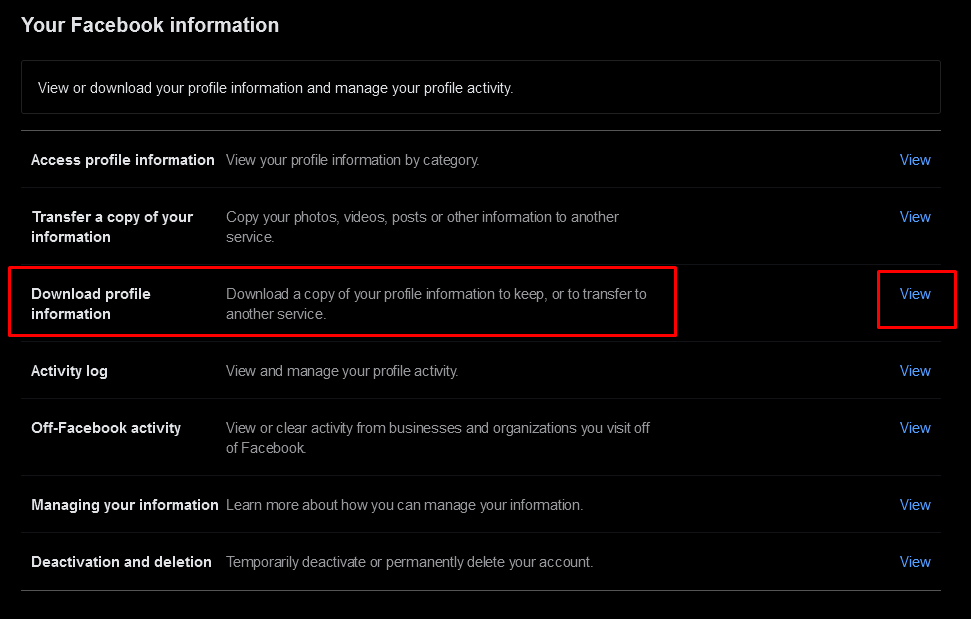
- On the main page, choose Download profile information, and select View next to it.
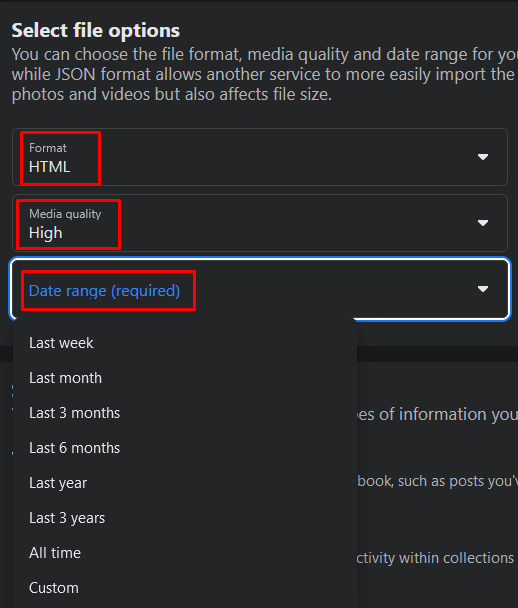
- Select the file options parameters however you want. HTML format is the easiest to open. Choose the date range carefully.
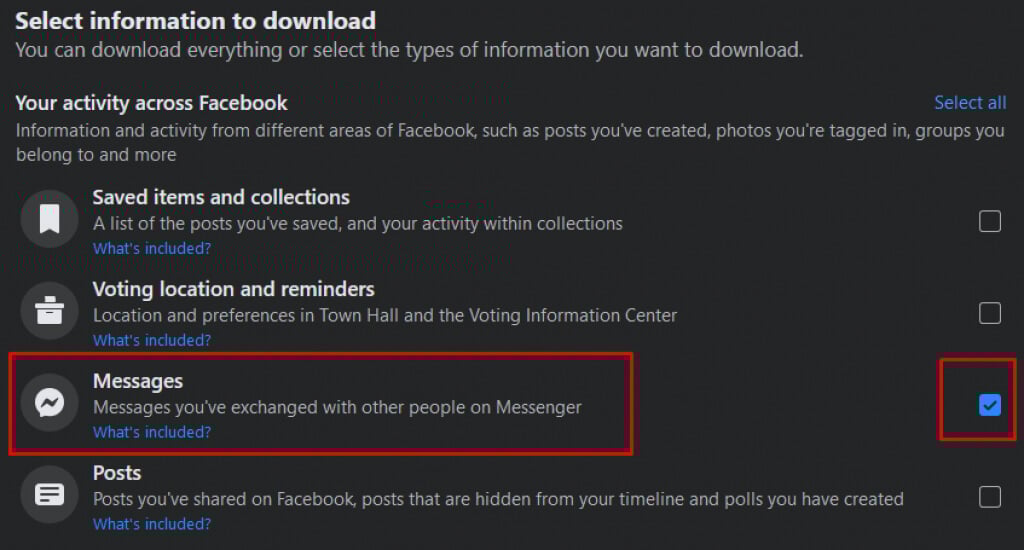
- Now you can select the type of information you want to download. Make sure to check the box next to Messages. You can also select all information.
- Once you set all the parameters, scroll to the bottom of the page and hit the Request a Download button.
It’ll take some time for Facebook to prepare your information for download. But don’t worry, you can continue your day normally, as you’ll receive a notification when the file is ready. Facebook will send you a link that you can use to download a copy of your Facebook information. Keep the backup files in a safe place.
Hopefully, one of the methods above helped you recover your deleted Facebook messages. If not, try contacting Facebook directly; they may be able to help you out. Keep in mind that it’s always a good idea to back up your Facebook account data, whether it’s important business dealings or just casual conversations with friends.

