An underrated feature explained for you
When you’re working with lots of open browser tabs, switching between them can be a pain. The “Pin Tab” feature helps solve this problem. It’s a long-time feature in many popular web browsers—Google Chrome, Firefox, Microsoft Edge, Safari, etc.
Pinning tabs helps to locate essential web pages in your browser. Pinned tabs take up less space than a regular tab, and they also survive a browser restart (assuming they’re on the last browser window you close). This tutorial explains how to pin a tab in Google Chrome. You’ll also learn every other thing about configuring and using Chrome’s “Pin Tab” feature.
Pin and Unpin Tab Using Mouse or Trackpad
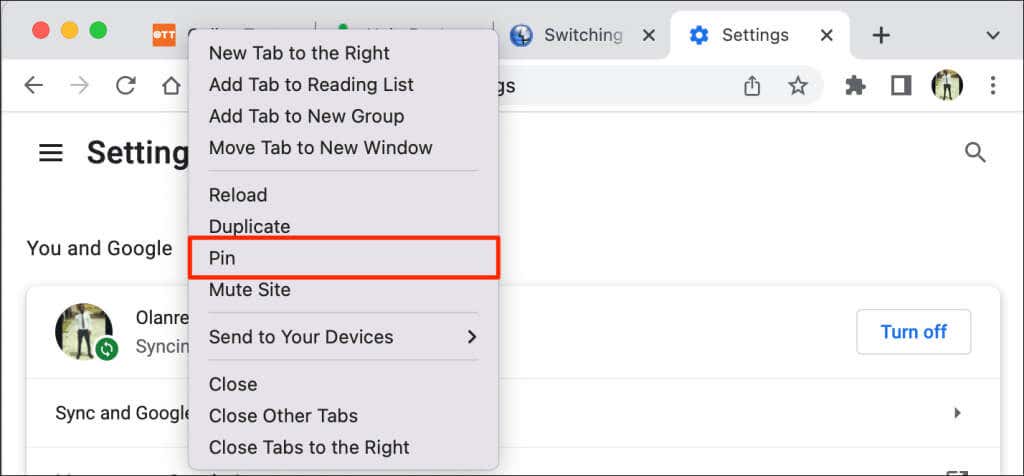
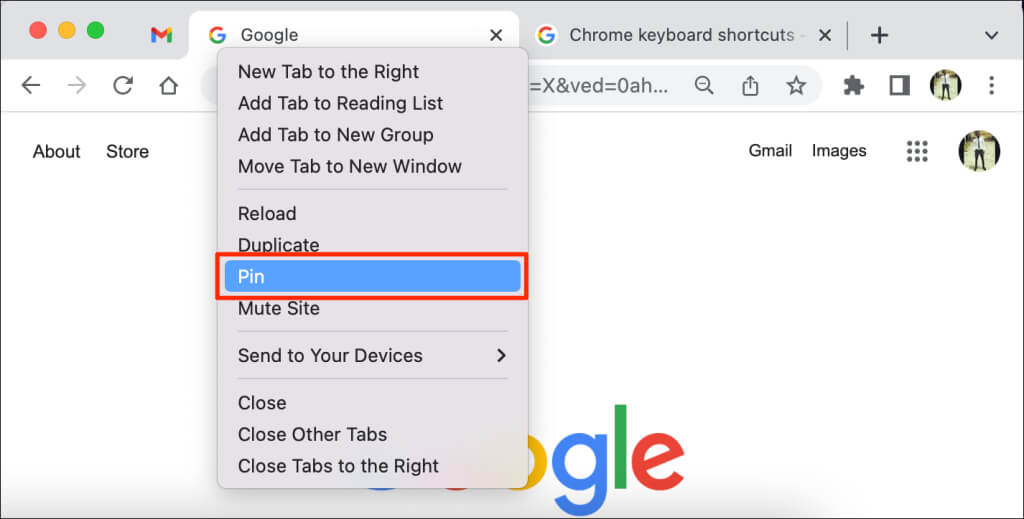
Open Chrome, right-click the tab, and select Pin.
Alternatively, right-click the tab and press P on your keyboard. Chrome will highlight the Pin option on the menu. Press Enter/Return to pin the tab.
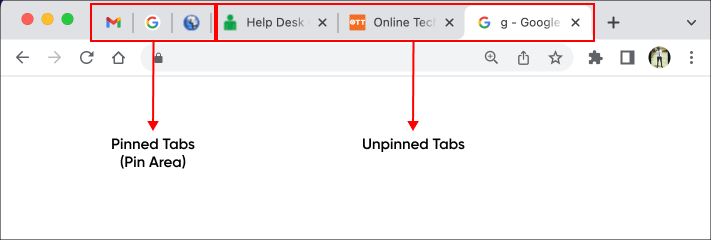
Chrome will move the tab to the “Pin Area” of the tab bar. Pinned tabs hide the page title and only displays the website’s icon on the thumbnail. Additionally, pinned tabs are smaller (square-shaped) than unpinned tabs with page titles.
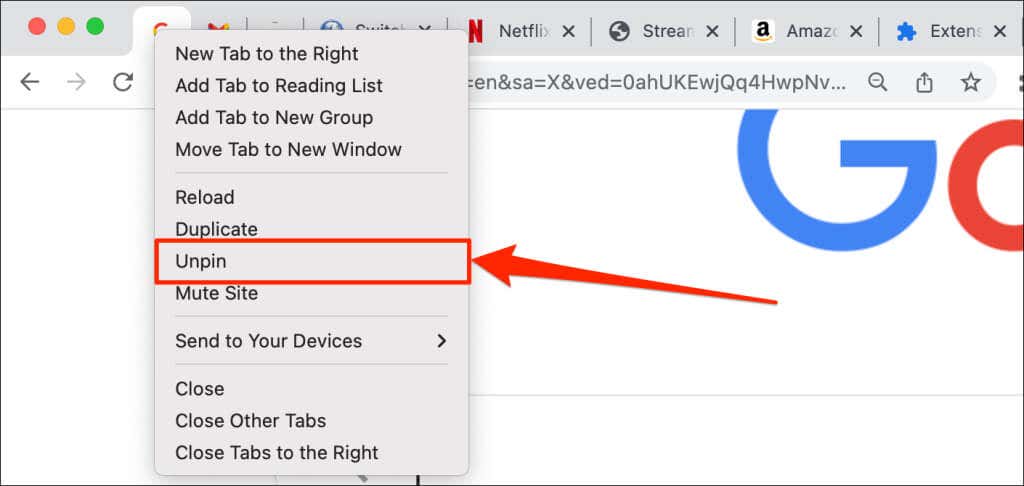
To unpin a tab, right-click the tab in the Pin Area and select Unpin.
(Re)Organize Pinned Tabs
Google Chrome arranges tabs from left to right in the order you pinned them. The first tab you pin stays fixed to the left edge of the tab bar while subsequent pinned tabs line up to the right.
You can always re-order pinned tabs within the Pin Area. Google Chrome doesn’t support moving or positioning pinned tabs outside the Pin Area.
To move a pinned tab, click on the tab, and drag it to your preferred position in the Pin Area.
Pinning vs. Grouping Tabs: What’s Different
Google lets you group tabs in the Chrome browser. Grouping tabs tidies up your tab bar and makes it easier to find tabs. You can create whatever groups help you stay more organized. For example, you might create a group of tabs for researching a project and another for “entertainment” apps like Netflix or Hulu. You could also create different tab groups for different priority tabs (like stuff you need to take care of right away and stuff that can wait).
Unlike pinned tabs, Chrome doesn’t move grouped tabs to the left side of the tab bar. Instead, the browser files and color-codes the tab in a new section on the tab bar. You can also give grouped tabs a name or title.
Here’s how to put tabs into groups in Google Chrome.
- Press and hold Control or Command (on Mac computers) and select the tabs you want to group. Chrome should highlight all selected tabs.
- Right-click any of the selected tabs and select Add Tabs to New Group.
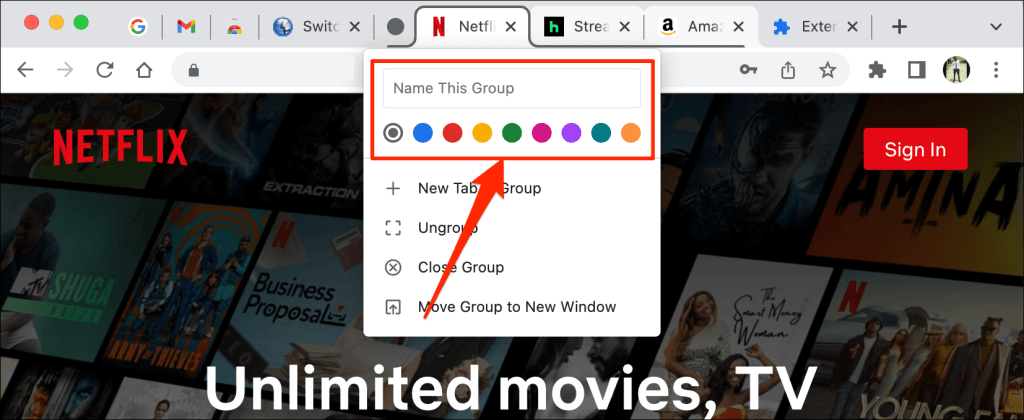
- Give the group a name and select a preferred color code or theme for the group. Press Enter or Return to proceed.
- You should now see the tab group on Chrome’s tab bar. Select the grouped tab to expand and view the tabs in the group. Select the group again to collapse the group.
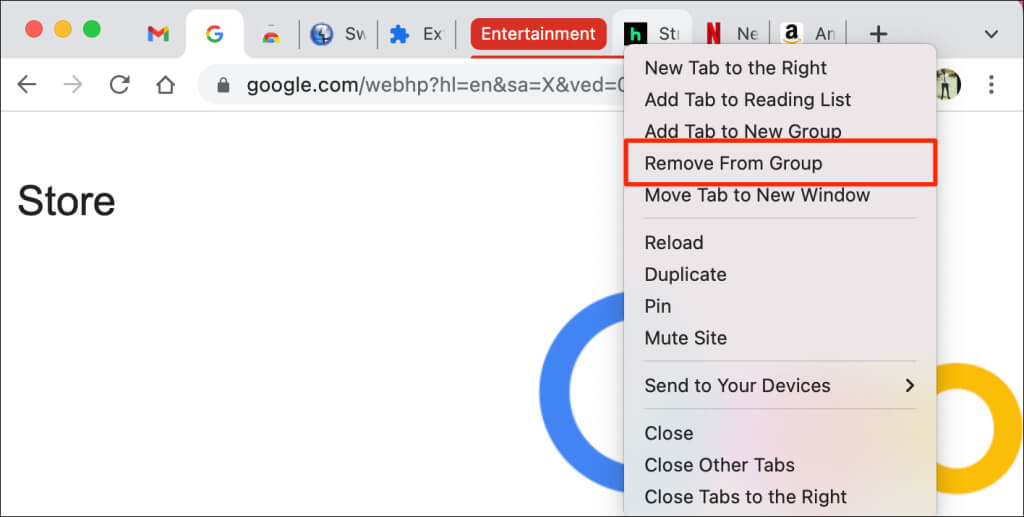
- To remove a tab from the group, expand the group, right-click the tab, and select Remove from Group.
Dragging a tab outside the group is another quick way to remove a tab from a group. You can also add a tab to an existing group by dragging it into the group.
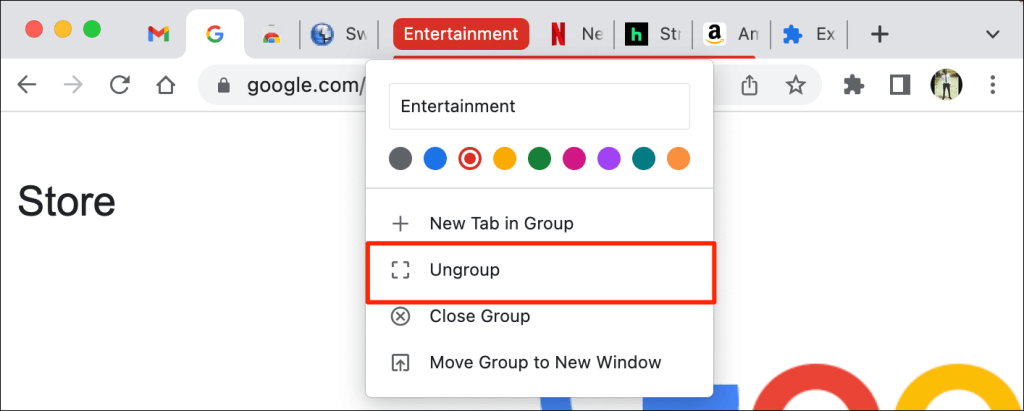
- To split the group into individual tabs, right-click the group title/name and select Ungroup.
- The “Close Group” option deletes the group and closes all member tabs. Right-click the group title and select Close Group to split the group and close tabs within the group.
You cannot pin a group of tabs. However, Chrome lets you pin individual tabs within a group. When you pin a tab in a group, Chrome moves the tab out of the group to the Pin Area.
Pin Tab Using Keyboard Shortcut
Google Chrome doesn’t have a built-in keyboard shortcut for pinning and unpinning tabs. However, you can manually create a keyboard shortcut using a third-party Chrome extension.
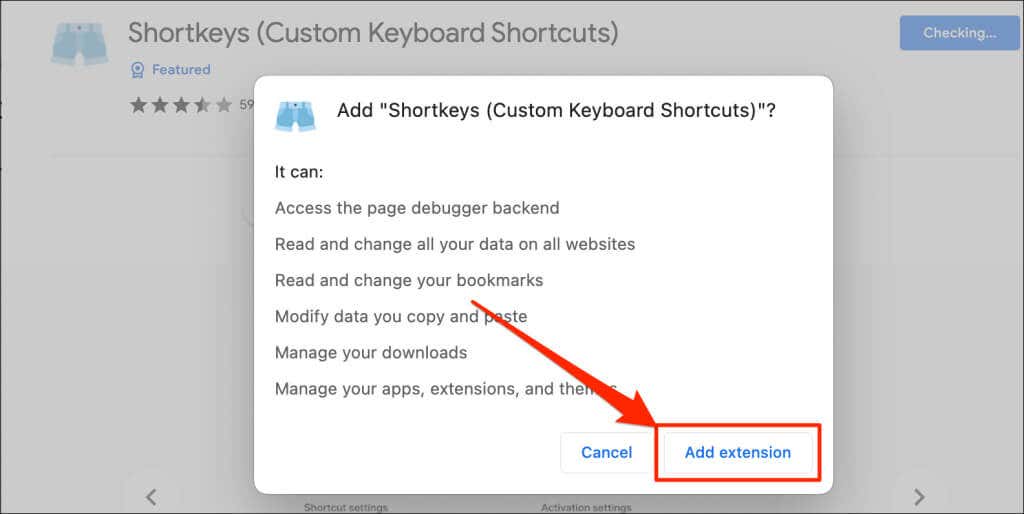
- Visit the Shortcuts (Custom Keyboard Shortcuts) page on the Chrome Web Store and select Add to Chrome.
- Select Add extension.
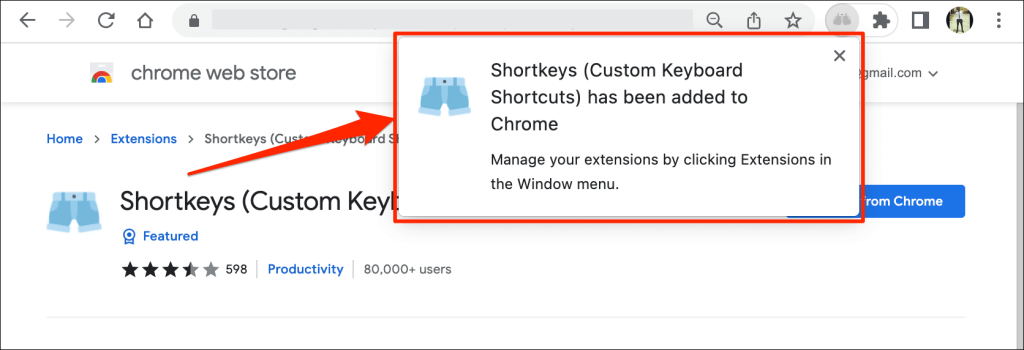
Proceed to the next step when Chrome successfully installs the extension.
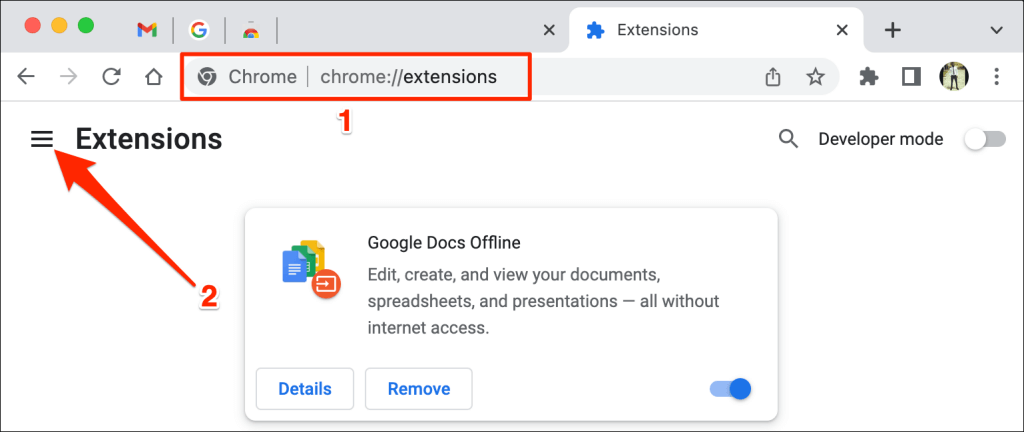
- Type or paste chrome://extensions in the address bar and press Enter (on Windows PCs) or Return (on Mac).
- Select the hamburger menu icon in the top-left corner of the “Extensions” page.
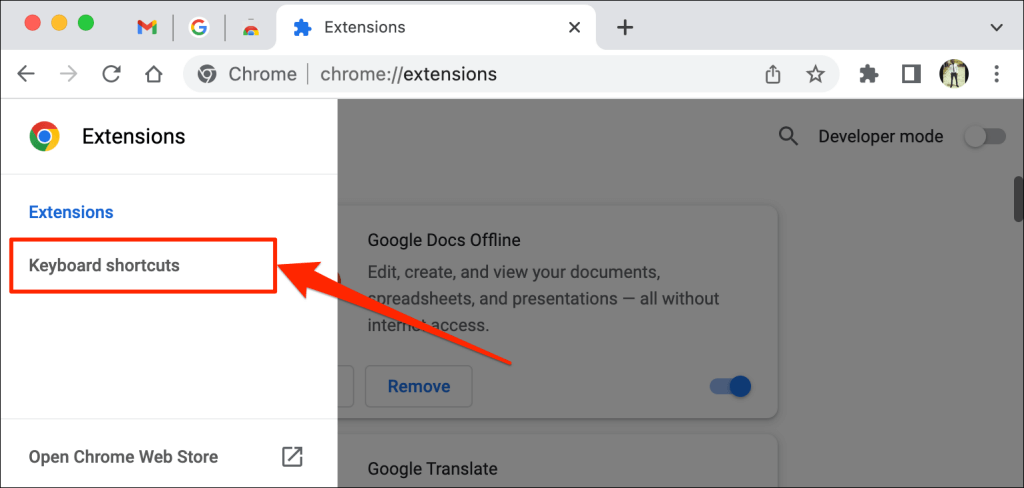
- Select Keyboard shortcuts.
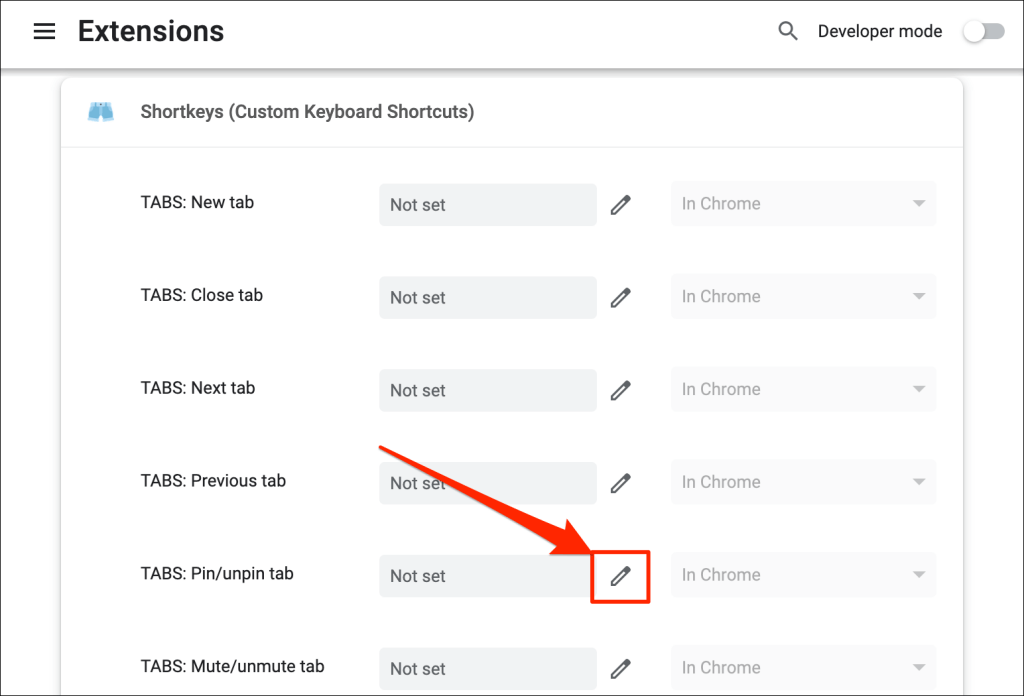
- Scroll to the “Shortkeys (Custom Keyboard Shortcuts)” section. Next, select the pencil icon next to the dialog box in the Pin/unpin tab row.
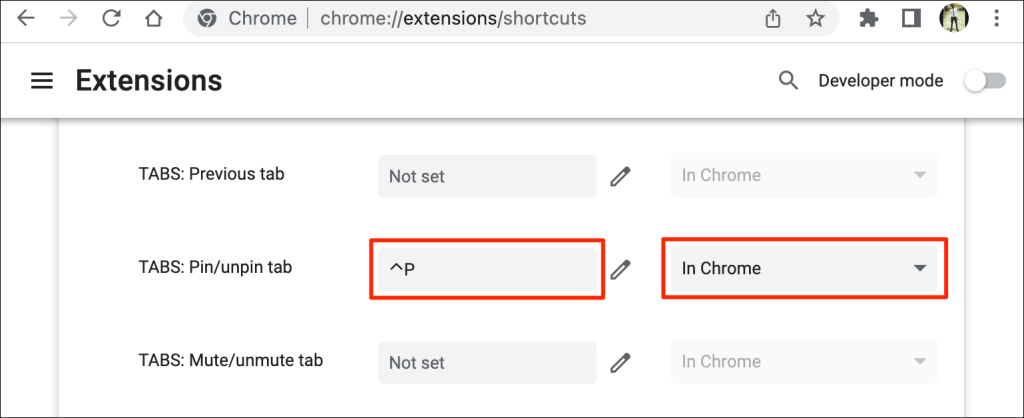
- Press the key combination you want to assign to pinning and unpinning tabs. For instance, Ctrl + P or Shift + P. For this tutorial, we’ll register Control + P as the shortcut for pinning and unpinning Chrome tabs on our macOS laptop. Finally, set the next drop-down menu option to In Chrome.
You should now be able to use the new keyboard shortcut to pin and unpin tabs in Chrome. One last thing you need to do is configure the Shortkeys extension to work in Incognito mode.
Chrome disables third-party extensions in incognito mode, so the shortcut won’t work when you open an incognito window. To pin browser tabs using keyboard shortcuts, enable the extension to work in Incognito mode.
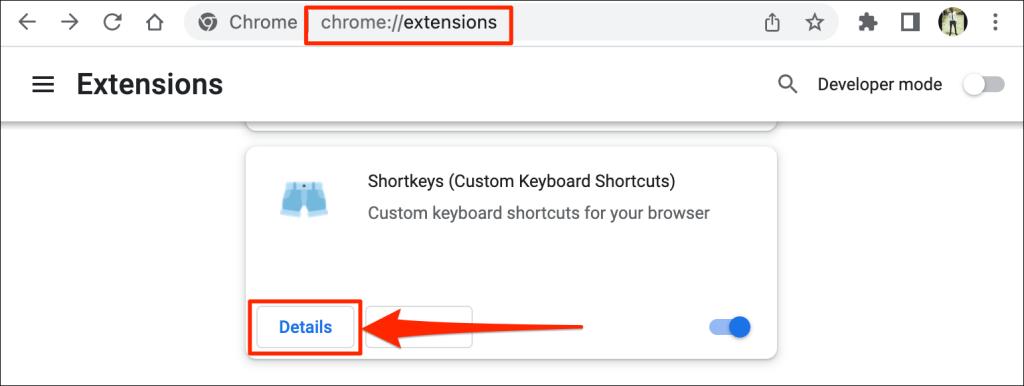
- Type or paste chrome://extensions in the address bar and press Enter or Return on your keyboard.
- Locate “Shortcuts (Custom Keyboard Shortcuts)” and select the Details button.
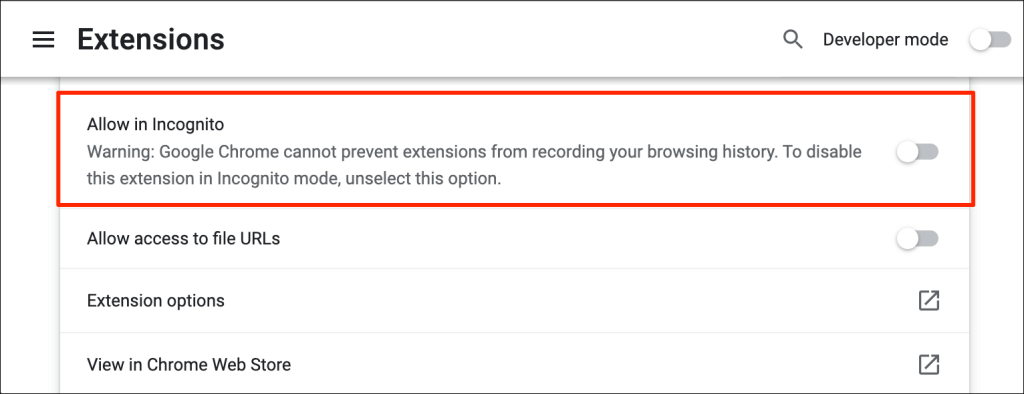
- Toggle on Allow in Incognito.
Your custom keyboard shortcut will now pin and unpin tabs in regular and Incognito mode.
Open Chrome With Pinned Tab
Google Chrome permanently fixes pinned tabs to the tab bar. Unless you unpin or close pinned tabs, they’ll remain in the “Pin Area” even when you close (and reopen) your browser. Grouped tabs and other regular tabs are closed.
However, note that you might lose pinned tabs in Chrome if you don’t close the browser correctly. If you keep multiple browser windows open, always close the window with pinned tabs last.
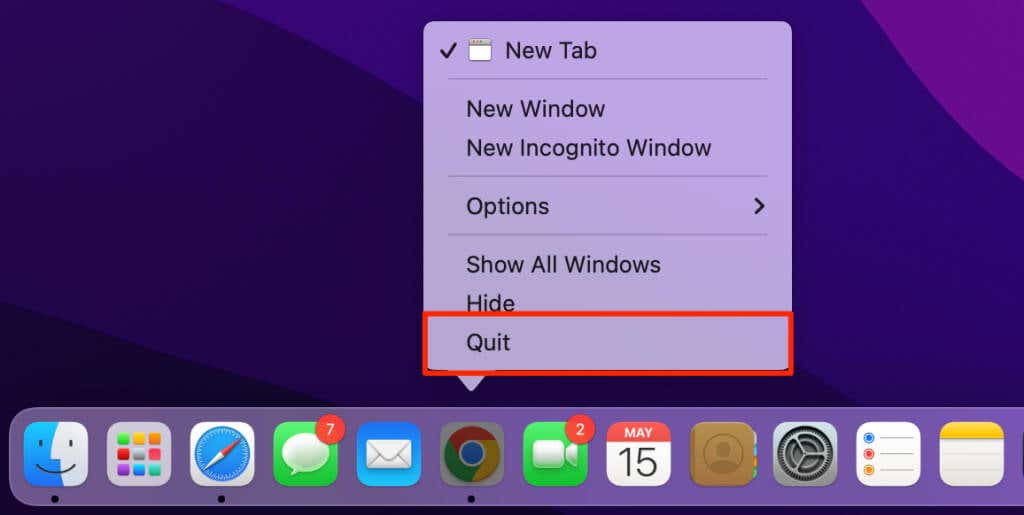
If you’re using a Mac computer, don’t close Chrome by clicking the red icon in the top-left corner of the browser window. Instead, right-click Chrome on the Dock, and select Quit. Alternatively, press and hold Command + Q for about 3 seconds until the browser closes.
When you reopen Google Chrome, it’ll immediately open the browser with your pinned tabs.
Pin the Important Tabs
If you can’t pin tabs, ensure you’re running the latest version of Google Chrome on your device.
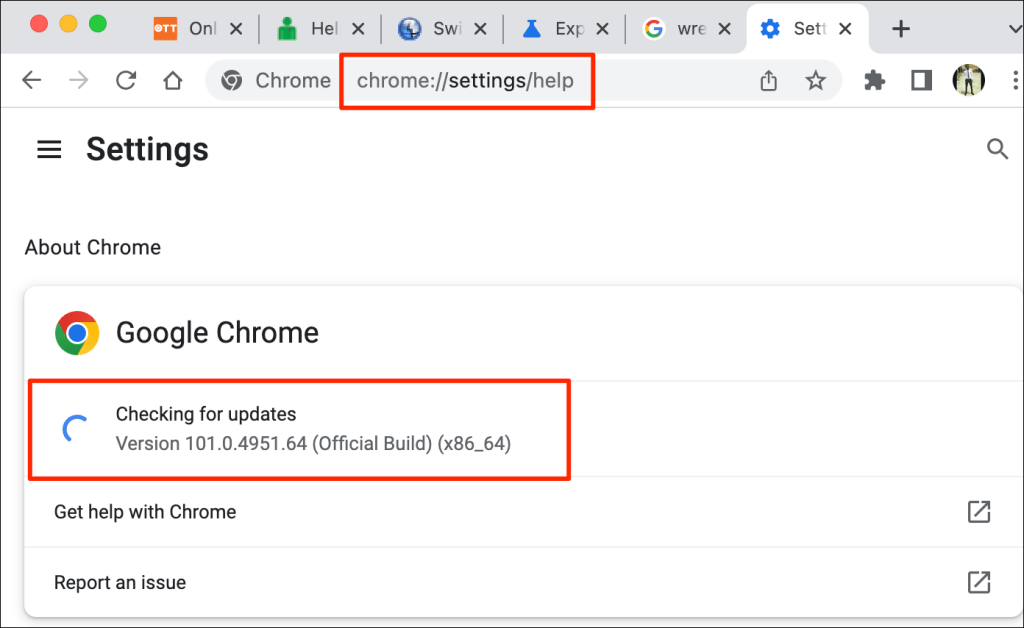
Type or paste chrome://settings/help in the address bar and press Enter/Return. Wait for Chrome to download the latest version of the browser.
You might need to close and reopen Chrome to install the update. Refer to our tutorial on updating Chrome for more information.

