Plus is this good or bad?
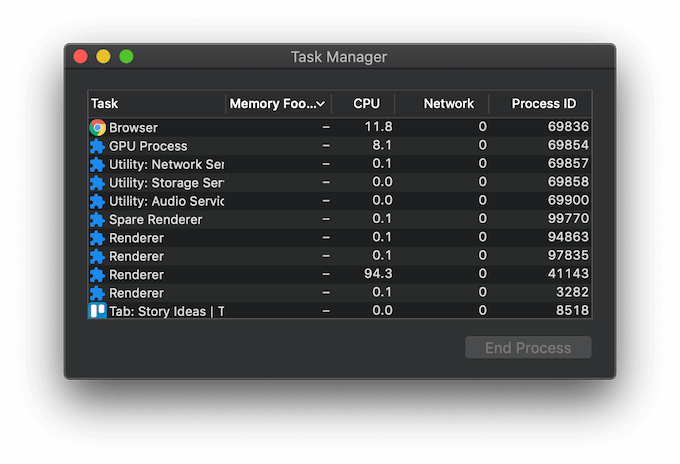
Have you ever opened Task Manager on your computer while running Google Chrome to see how many processes the browser keeps open in the background? Even if you only have two or three tabs open, you’ll see many more Chrome entries in the Task Manager. All of them represent the processes associated with your browser.
Find out whether Chrome running so many processes is an advantage or a disadvantage, as well as how to reduce the number of these processes.
How to Check Chrome’s Processes in Task Manager
Task Manager is an essential tool for any user that can help you improve your computer’s performance or troubleshoot a number of issues in your operating system. There are multiple ways to open Task Manager in Windows and Mac. However, you can open Task Manager in Google Chrome to see only the processes that Chrome’s currently running.
To open Task Manager on your computer, follow the steps below.
- Open the Chrome browser.
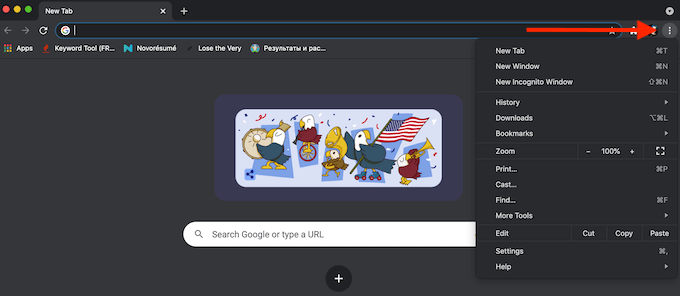
- Select the three dots in the upper-right corner of your screen to open Chrome’s Menu.
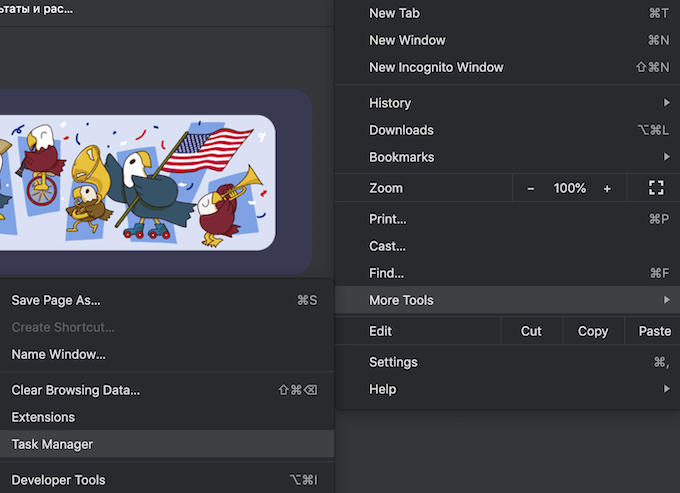
- From the menu, select More Tools > Task Manager. In Windows, you can also use the keyboard shortcut Shift + Esc to open Task Manager.
This will open Task Manager in Google Chrome, so you can see the list of the active Chrome processes.
Is Chrome Running Multiple Processes a Bad Thing?
The secret to why Task Manager shows so many processes for Chrome is in how this browser works. Google Chrome creates three types of processes: tabs (for every tab you have open), renderers, and plug-ins. For every extra tab or extension you’re using, Chrome creates a separate set of operating system processes, all running simultaneously.
This multi-process architecture is a unique Google Chrome feature that allows your browser to not rely on the work of every single process to function. If a particular process freezes or stops working, the other processes won’t be affected so you can resume working in Chrome. Running multiple processes simultaneously also makes Chrome more responsive.
At the same time, some users find this problematic and look for a way to reduce the number of processes that Chrome opens up. The good news is, there’s more ways than one to do this.
How to Reduce the Number of Processes that Chrome Runs
Here are several ways that you can use to reduce the number of processes that Chrome opens. You can choose one of the methods or try all of them.
Turn Off Background Processes
One of the first things you can do is to disable processes that Chrome’s running in the background. To do that, open Google Chrome, then open the menu and follow the path Settings > Advanced > System. Disable the Continue running background apps when Google Chrome is closed option.
Disable Google Chrome Add-Ons & Extensions
The number of active Chrome processes also depends on how many add-ons and extensions you have installed in your browser. Disabling them will help you significantly reduce the number of active processes.
You don’t have to get rid of all of your add-ons and extensions at once. Start with the ones that you don’t use on a daily basis. Open the Chrome menu and follow the path More Tools > Extensions. Find the extensions that you want to get rid of and toggle the switch next to them to disable the extensions.
Google Chrome extensions and add-ons can improve your user experience and allow you to access functions otherwise unavailable in Chrome. However, they also eat up a lot of resources. If after you disable the extensions you realize that you don’t need them anymore, it’s better to uninstall them.
In the extensions list, select Remove to delete an extensions from Google Chrome.
Manually End Processes in Google Chrome
Manually removing extra processes can also help you preserve resources. You can do that via the Task Manager that’s built into Google Chrome. To do that, follow the steps below.
- Open Chrome’s Menu (three dots in the upper-right corner of the screen).
- Select More Tools.
- Select Task Manager.
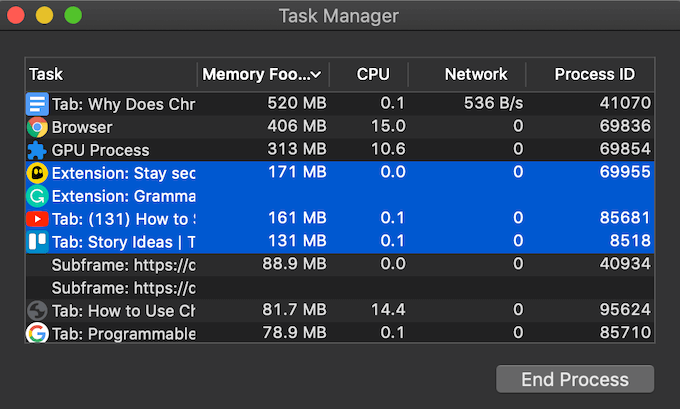
- Find the process that you want to delete and select End Process. You can stop more than one process at a time. To do that, hold down the Shift (for Windows) or Command (for Mac) key, then select multiple entries on the list and select End Process.
Bear in mind that ending processes will close the tabs associated with them. Make sure to only end the non-essential processes that are problematic and causing your browser to slow down, like the frozen tabs or laggy extensions. Otherwise you’ll end up disabling Chrome and will have to restart the browser.
Clear Your Browser’s Cache & Cookies
Clearing cache and cookies regularly is a preventative measure that you can take to prevent your browser from overloading and using up too many resources. Temporary files saved in Chrome might be causing issues with your current browsing session.
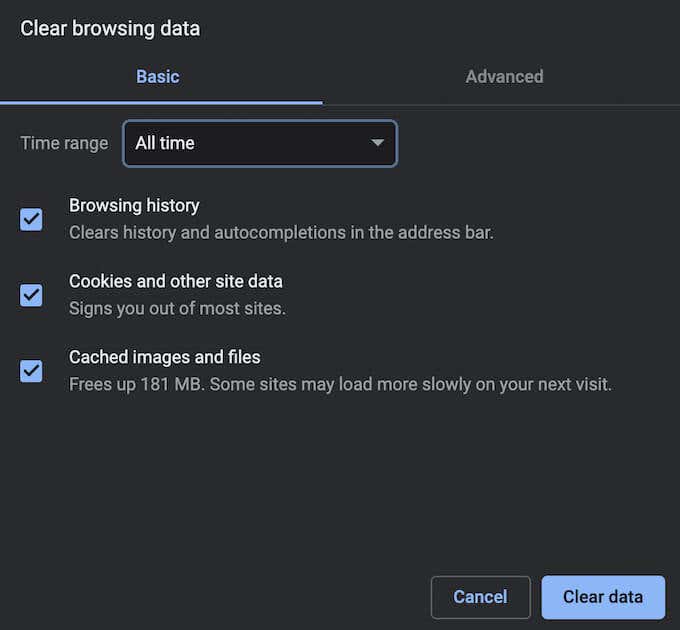
You can clear your browser’s cache by following the path History > Show Full History > Clear browsing data. Make sure to tick all of the boxes: Browsing history, Cookies and other site data, and Cached images and files. Choose the time range and select Clear data.
Make Your Browser More Efficient
By default, Google Chrome opens a separate process for every new tab, renderer, add-on or extension. One obvious way to avoid Chrome opening too many processes is by keeping fewer tabs open in your browser. Make it a habit to close every tab that you don’t need anymore after you’re finished using it.
Does the number of Chrome processes that show up in Task Manager bother you? What method do you use to reduce this number? Share your Chrome processes-related experience in the comments section below.

