Saves time coordinating all your schedules
When you want to see shared calendars for your family or coworkers or your subscribed calendars, you can easily add one to Microsoft Outlook. However, if you create a calendar group, you can see multiple calendars side-by-side or alongside your own.
We’ll show you how to create a calendar group in Outlook, view the group, and add or remove calendars from it. This can save time when trying to coordinate between multiple calendars. It lets you plan your schedule without conflicting with other calendar events, and you can see everyone’s schedule at a glance.
Note: Calendar groups currently work with Microsoft Exchange Server accounts using Outlook 2010 or later or Outlook for Microsoft 365.
Create a Calendar Group in Outlook
Open Outlook and head to the Calendar tab using the Calendar icon. Then follow along to set up your calendar group.
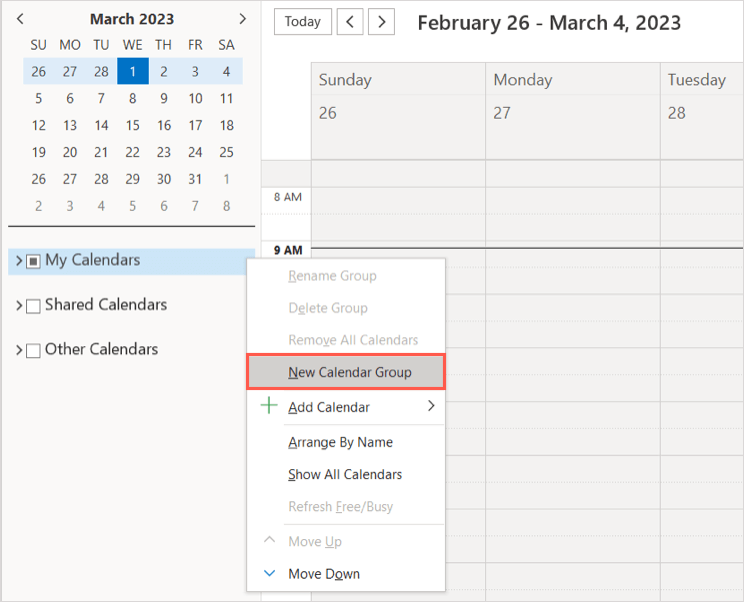
Select the Home tab and go to the Manage Calendars group. Pick Calendar Groups > Create New Calendar Group. If you don’t have the option in your version of Outlook, right-click My Calendars in the navigation pane on the left and choose New Calendar Group.
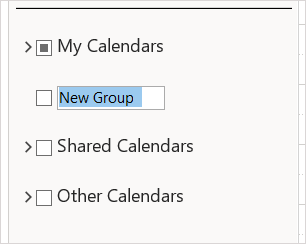
You’ll see the group in the sidebar titled “New Group”. Select that text, type the name you want to use for the group, and press Enter.
Add Calendars to the Group
Next, you’ll add the calendars you want to view in the group from your address book, room list, the internet, or shared calendars.
You can move a calendar to the group by selecting and dragging it to the group in the navigation pane. If you don’t see the calendar or don’t necessarily want to move it, you can add it using the option below instead.
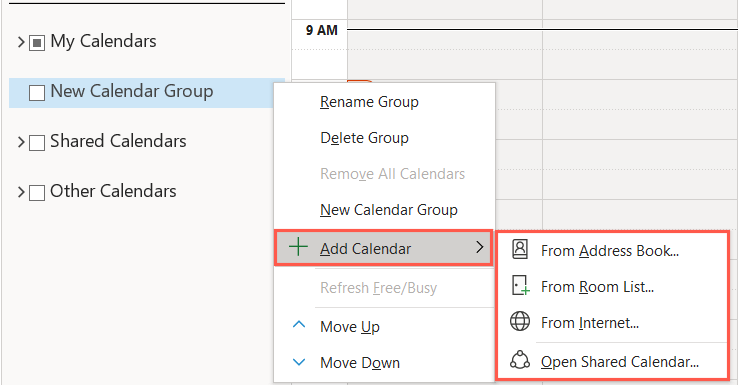
Right-click the new group and choose Add Calendar. Then, pick an option from the pop-out menu.
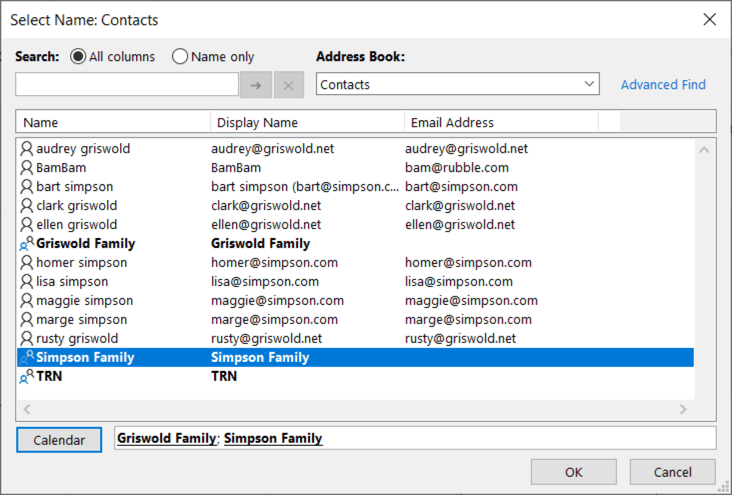
- From Address Book: Select the address book, contact list, or use the Search box to find the contacts you want. Pick the contacts, select Calendar at the bottom to add them to the list, and choose OK.
- From Room List: Select the address book or use the Search box to find the rooms you want. Pick the rooms, select Rooms at the bottom to add them to the list, and choose OK.
- From Internet: Enter the location of the internet calendar and select OK.
- Open Shared Calendar: Enter the name of the shared calendar and pick OK or select Name to browse for and choose the shared calendar.
With the first two options, you can add more than one calendar at a time. For additional internet or shared calendars, follow the same steps for those you want to add to the group.
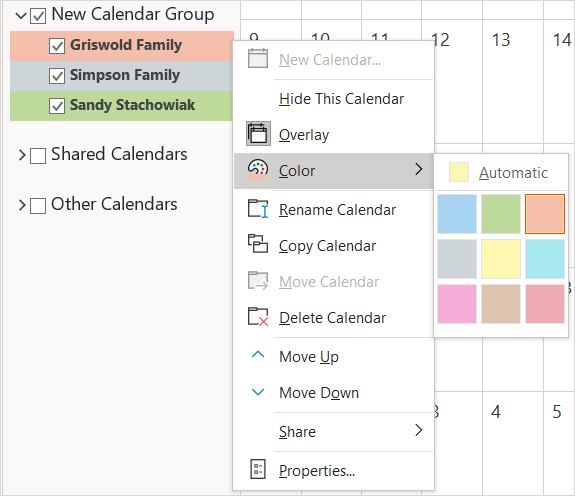
To edit a calendar’s appearance after you add it to the group, right-click it. You can then rename the calendar or change its color.
View a Calendar Group in Outlook
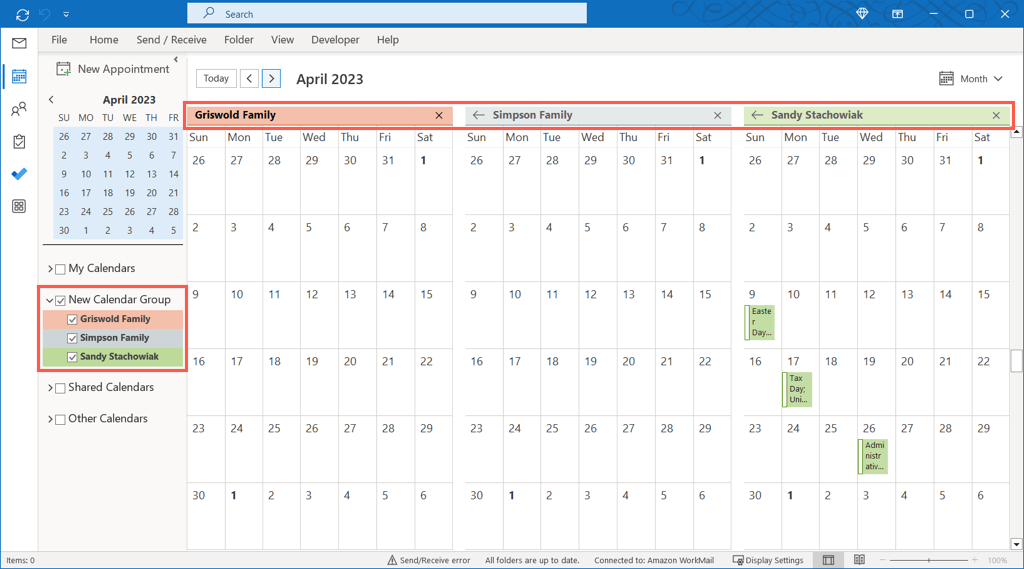
Once you have your group, you can see the entire group at once in the calendar view. You can also hide calendars from it to concentrate on the others.
Mark the check box next to the calendar group name in the sidebar to view the entire group.
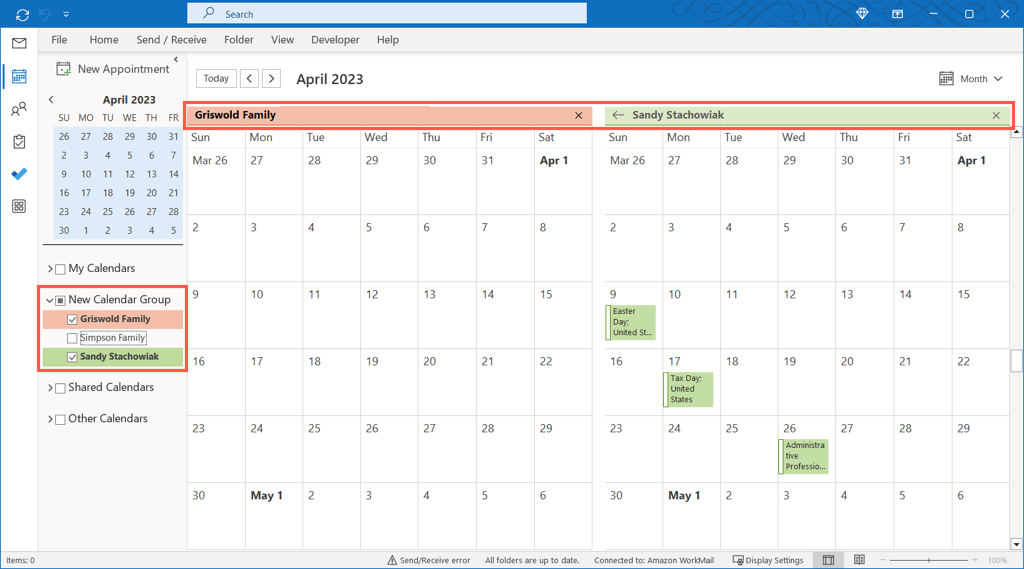
Expand the group in the sidebar and check those calendars you want to view or uncheck the calendars you want to hide.
Remove Calendars From a Group
If you no longer want to view a calendar in the group, you can remove it easily.
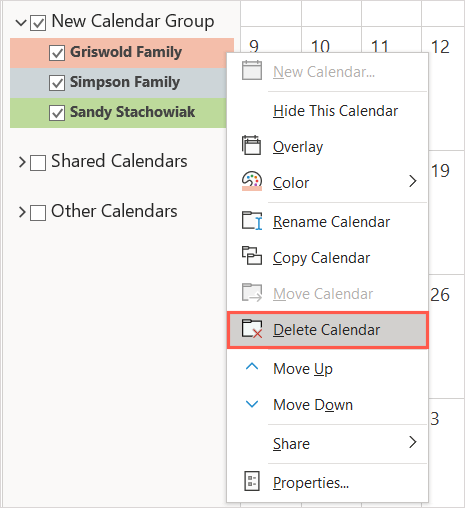
Right-click the calendar name in the calendar group and select Delete Calendar.
This does not delete the calendar completely; it simply removes it from the group.
Delete a Calendar Group
If you no longer want the entire calendar group, you can remove it as well.
First, remove the calendars from the group as described above. Then, right-click the group name and pick Delete Group.
Confirm that you want to delete the group by selecting Yes in the dialog box. This moves the contents of the calendar group to the Deleted Items folder.
Calendar Groups Make Planning a Breeze
Calendar groups are handy for seeing your family members’ calendars for planning outings or your coworkers’ calendars for scheduling meetings. You can also see internet calendars like those for your favorite sports team or TV shows to see how their schedule fits into yours.
For more, look at how to create a group calendar in Microsoft 365 to use a shared calendar with your circle.

